Custom Logo Makeup Bags: Decoration Methods, Costs and Durability
Executive Summary
Which decoration method should carry a brand mark on a custom logo makeup bag? The answer is set by the substrate before it is set by the artwork: screen printing or a direct-to-film transfer on cotton canvas and polyester, dye sublimation where the shell is white or light polyester, and embroidery or an applied patch where the fabric is heavy enough to carry thread without puckering. Programmes of this kind run at a minimum order quantity of 500 pieces per style and colourway. Sampling takes 6-10 working days, or 12-15 working days for complex constructions, bulk production takes 35-50 days after sample approval, and finished goods are inspected to AQL 2.5 under ISO 2859-1.
Cost behaviour differs more than durability does. Screen printing carries a per-colour set-up charge amortised over the run, so a two-colour mark becomes cheap at volume and expensive at 500 pieces with six colours. Digital transfer carries almost no set-up and a flat per-piece cost regardless of colour count. Embroidery carries a one-time digitising charge and then a cost that tracks stitch count. Embossing, foil and metal plates carry tooling that only pays back across repeat seasons.
This guide walks through every mainstream method, the substrates each one needs and the artwork files each one requires, plus the fastness tests a buyer should specify rather than hope for. It ends with the one subject no decoration brief can ignore: the mark must be the buyer's own or licensed.
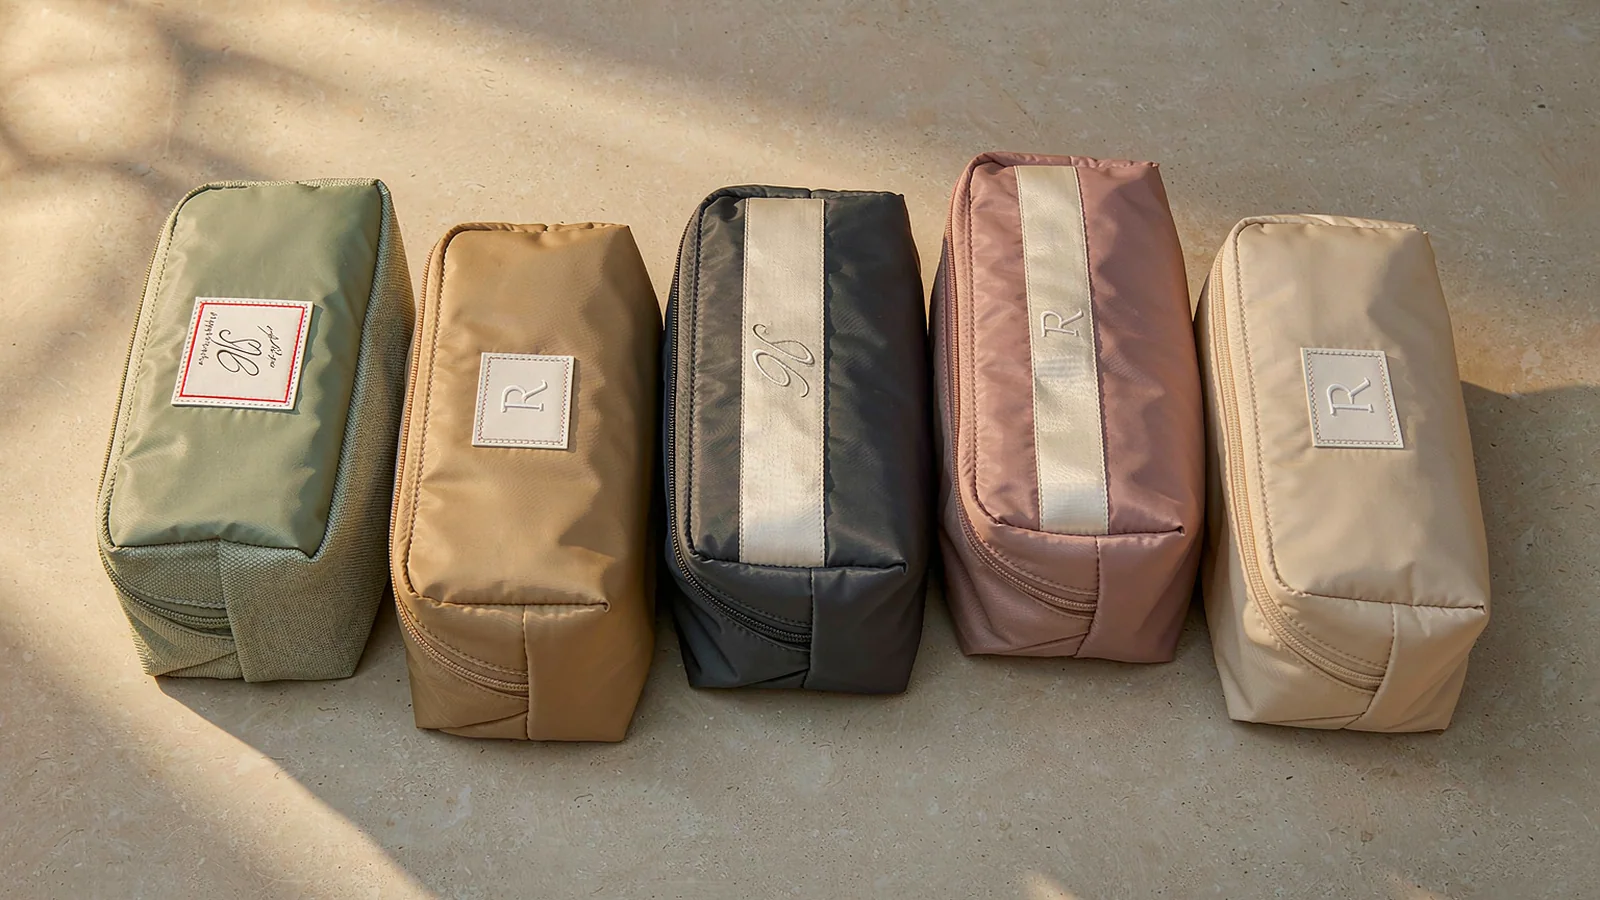
Start With the Substrate: How a Logo Actually Gets Onto a Cosmetic Bag
A brand mark lands on a cosmetic bag in one of three physical ways: as a film sitting on top of the fabric, as dye or resin held inside the fibre, or as a separate object attached to the bag. Every downstream decision follows from which of those three is possible on the chosen shell. Buyers who choose decoration last routinely discover that the approved mark requires a substrate change — a photographic logo needs a polyester face for sublimation, and a dense embroidered crest needs a fabric heavy enough to carry 6,000 stitches. Sequencing substrate-first avoids a re-sample cycle, and at 6-10 working days per round that is the most expensive delay in a launch calendar.
The first filter is fibre chemistry. Polyester is the most forgiving shell in the category: it accepts plastisol and water-based screen ink, takes a transfer film, sublimates directly, and is stable under a press. Nylon, typically 210D or 420D ripstop, is heat-sensitive and has no affinity for disperse dye, so sublimation is unavailable. Cotton canvas in the 10-16 oz range (roughly 340-540 g/m²) gives the best print surface of all and carries embroidery well, but it will not sublimate either. Genuine leather and thick PU are decorated by heat and pressure rather than ink, and moulded EVA shells can only be marked on a flat panel before forming or with an applied patch.
The second filter is geometry. Screen printing and transfer both need a continuous plane that lies flat under a platen or press head. A mark crossing a bound seam, a piped edge or a zipper tape cannot be printed in one pass; it must be split, moved to a flatter area, or converted into a patch that bridges the interruption. Keep 8-10 mm of clearance from any seam line, and state placement as a dimension from a named datum — 22 mm down from the top bound edge, for example — rather than as the word centred. Near a zipper, the tape and coil compress differently from the surrounding fabric.
The third filter is the finish already on the fabric. A PU coating, a durable water-repellent treatment or a silicone softener all reduce ink adhesion, and the plasticisers inside PVC migrate slowly to the surface and soften a print film from underneath during storage. Coated fabrics are characterised for coating adhesion under ASTM D751, and a printed logo on a coated shell needs an ink system qualified on that specific coating, not merely on the base cloth. Recycled rPET prints like virgin polyester, and chain-of-custody documentation for the recycled content follows the Global Recycled Standard.
| Substrate | Methods that bond well | Workable with limits | Usually avoided |
|---|---|---|---|
| 600D or 300D polyester, PU coated | Screen print with plastisol, direct-to-film, embroidery over cutaway backing, woven label | Sublimation on an uncoated face only; vinyl below 150 C | Hot-foil emboss above 160 C |
| 210D or 420D nylon ripstop | Direct-to-film, low-temperature vinyl, screen print with catalysed nylon ink | Embroidery at reduced stitch density | Dye sublimation, high-heat foil |
| Cotton canvas, 10-16 oz | Water-based or plastisol screen print, embroidery, leather patch, woven label | Direct-to-film, with less stretch than on synthetics | Dye sublimation without a polymer coating |
| PU or TPU laminated fabric | Screen print with PU-compatible ink, direct-to-film at controlled temperature | Blind emboss or foil at 120-140 C | Embroidery, which perforates the coating |
| Clear PVC or clear TPU | Screen print with a flexible ink system, low-temperature transfer | Woven label sewn into a seam allowance | Embroidery, hot foil, sublimation |
| Genuine leather, 1.0-1.6 mm | Blind emboss, foil stamping, debossed leather patch | Screen print with a leather-specific ink | Sublimation, high-density embroidery |
| Moulded EVA shell | Screen print on the flat panel before forming, applied PU patch | Direct-to-film on low-arc areas only | Embroidery, any press above 90 C |
| Non-woven polypropylene, 80-120 g/m2 | Screen print, low-temperature direct-to-film | Woven label sewn into a side seam | Embroidery, sublimation, foil |
The fourth filter is volume against colour count, because that pairing decides which method is cheaper. Every screen-printing colour needs its own screen, set-up and press pass, so a cost that is trivial at 5,000 pieces is material at 500. Digital transfer inverts the logic: the file costs the same in one colour or in full colour. A first run of 500 pieces with a four-colour mark should be priced both ways.
- Fix the shell first. Fabric, coating and colour are decoration constraints, not decoration afterthoughts.
- Decide whether the mark sits on the surface, in the fibre, or as an attached object, then eliminate every method that cannot do that on the chosen shell.
- Measure the available print area on the flat pattern piece, not on the assembled bag, and keep 8-10 mm clear of seams and zipper tapes.
- Count spot colours honestly. If the artwork needs gradients or photography, move off screen printing early.
- Match the method to the volume. Set-up-heavy methods need repeat seasons to pay back; digital methods suit short runs and frequent artwork changes.
A minimum order quantity of 500 pieces per style and colourway is the point at which most decoration set-ups become economically sensible. Tooling such as an embossing die or a metal plate is reusable across seasons, while screens are often reclaimed after a run; the buyer should ask which charges are one-time and which repeat on every re-order.
Ink Sitting On the Surface: Screen Printing, Heat Transfer and Direct-to-Film
Three methods put a coloured layer on top of the fabric rather than into it. They are often quoted against each other, and they fail in different ways, so the useful comparison is behaviour rather than price: what happens to the film when the bag is folded, scraped against a suitcase lining or wiped with make-up remover.
Screen printing: mesh count, ink system and cure
Screen printing pushes ink through a tensioned mesh with a squeegee, and mesh count sets the detail ceiling. A 120-160 mesh lays a thick deposit suited to canvas and bold one-colour marks; a 200-230 mesh holds finer strokes on smooth polyester but deposits less ink, which matters when printing light colours onto dark grounds. Plastisol is the default for synthetic bags: it sits as a film and cures by heat rather than by drying. Water-based ink penetrates the fibre for a softer hand on cotton but dries in the screen. Cure is the variable most often omitted from a specification — the deposit must reach fusion temperature through the whole film, not just at the surface.
Colour handling is where screen printing wins and loses. Each spot colour needs a separate screen, so a two-colour logo is economical and a seven-colour logo is not. Gradient or photographic artwork can be reproduced by simulated process printing using halftone dots in four to six screens, but the result depends heavily on mesh, dot gain and ground colour. Registration holds to about 1-2 mm on flat panels, and thin outlines reversed out of a solid fill close up first.
Heat transfer and cut vinyl
Heat-transfer vinyl is cut on a plotter, weeded and pressed at roughly 150-160 C for 10-15 seconds. It gives a crisp edge and an opaque film, suits single-colour wordmarks, and carries no screen charge. The trade-offs are hand feel and edge life: the film is thicker than a print, multi-colour designs are built by layering sheets, and the edges of small elements lift after repeated flexing. Because the method depends on heat and pressure, it suits clear PVC, thin TPU and moulded EVA poorly — all distort under a press head.
Direct-to-film
Direct-to-film builds the image on a PET carrier with pigment inks plus a white underbase, dusts it with hot-melt adhesive powder, gels the powder, then presses the transfer at 150-160 C for 10-15 seconds. Because the image is printed digitally, colour count is irrelevant to cost, gradients reproduce faithfully, and detail survives at about 0.5 mm stroke width. The film is thinner than vinyl and flexes better than a stacked vinyl build, which is why it is now the default answer for multi-colour artwork at moderate volume. The failure mode is under-cured powder: a transfer pressed before the adhesive has fully melted looks perfect and delaminates in the first wash.
Ink chemistry is a compliance question as well as a performance one. Pigment systems used on textile articles sold into the EU are assessed against restricted-substance rules under EU REACH, and many buyers also ask for the printed assembly to be certified against OEKO-TEX Standard 100, which tests the finished article rather than the ink alone. Both belong in the tech pack, not in an email after sample approval.
| Attribute | Screen printing | Heat-transfer vinyl | Direct-to-film |
|---|---|---|---|
| Colour handling | One screen per spot colour; halftones for tonal art | One vinyl layer per colour; layering adds thickness | Full colour plus white in one pass |
| Fine detail | Clean to about 0.25 mm at 200 mesh | Clean to about 1.5 mm; small islands lift | Clean to about 0.5 mm with halftone edges |
| Set-up and tooling | Screen and frame charge per colour | No screen; cutting and weeding time per piece | No screen; digital file only |
| Hand feel | Ink film roughly 30-120 microns | Film roughly 80-150 microns, plastic edge | Film roughly 60-100 microns; softer than vinyl |
| Stretch and crack behaviour | Plastisol flexes; risk on high-plasticiser PVC | Lifts at the edges after repeated flexing | Hot-melt layer flexes well once fully cured |
| Abrasion on coated fabric | Good with a matched ink and full cure | Fair; edges catch on linings | Good; depends on press time and temperature |
| Volume sweet spot | 500 pieces and above, few colours | 100-500 pieces, one or two colours | 300 pieces and above, multi-colour |
| Illustrative planning range | Roughly $0.15-$0.60 per piece per colour plus set-up | Roughly $0.30-$1.20 per piece, no set-up | Roughly $0.40-$1.50 per piece regardless of colour count |
- Mesh count — threads per inch in a printing screen; low counts lay down more ink, high counts hold finer detail.
- Plastisol — a PVC-particle ink suspended in plasticiser that cures by heat fusion rather than by evaporation.
- Flash cure — a partial cure between colour passes that stabilises one layer so the next can be printed without smearing.
- Underbase — a white ink layer printed first so that light colours stay visible on a dark ground.
- Hot-melt powder — the adhesive layer in a direct-to-film transfer that bonds the image to the fabric under heat.
- Weeding — removing unwanted vinyl around a cut design before the transfer is pressed.
For a buyer choosing between the three, the decision tree is short. One or two flat spot colours on a stable substrate at 500 pieces and above: screen printing. One or two colours on a heat-sensitive shell at a smaller quantity: cut vinyl, with an honest expectation about edge life. Anything with a gradient, a photograph or more than three colours: direct-to-film, provided press parameters are written into the specification and checked on a pre-production sample.
Colour In the Fibre and In the Thread: Dye Sublimation and Embroidery
The two methods in this section are chosen for permanence rather than for cheapness. Both put the mark into the material rather than onto it, and both impose hard artwork constraints that a buyer has to accept before the method can be used.
Dye sublimation and why it needs polyester
Sublimation is not a coating. A disperse dye is printed onto paper, laid against the fabric, and heated to roughly 190-210 C for 30-60 seconds, at which point the dye turns from solid to gas and diffuses into the polymer itself. Cooling fixes it there. That mechanism explains every limitation of the method. The dye needs a polymer to diffuse into, so polyester works and cotton, nylon, leather and uncoated canvas do not; a polymer-coated hard surface or a polyester-coated blend can be made to work, but the coating becomes part of the specification. There is no white in the process, so the ground must be white or very light, and any colour in the artwork is rendered as a translucent tint over that ground. Finally, because the dye is inside the fibre, the finished mark has no hand feel and cannot crack or peel, which is why sublimation is the first choice for all-over pattern work on polyester shells.
The practical consequences show up in planning. All-over sublimation requires the panel to be printed flat and then cut, so seam matching across a gusset or a zipper placket becomes a pattern-engineering problem with waste allowance to budget for. Colour is matched on a dye curve rather than by mixing ink, so a Pantone-governed brand colour lands within a tolerance rather than exactly, and dye lots can shift visibly on a repeat order produced months later. Light and wash fastness are assessed within the ISO 105 family of colour-fastness tests, and the buyer should specify which parts apply and what rating is required.
Embroidery: density, backing and pull
Embroidery sews the mark rather than printing it, and it carries a perceived-quality weight that no print method matches. It also has the tightest artwork constraints. Legibility starts at roughly 5-6 mm of cap height for a satin-stitched letter; below that the columns of stitches merge and the counters of letters such as e, a and o fill in. Thin strokes below about 1 mm are equally risky. Small marks are better rendered as a simplified lock-up, or moved to a woven label or a patch, than shrunk into an unreadable stitch block.
Fabric weight governs the rest. Stitch density has to fall as fabric gets lighter, otherwise thread tension pulls the panel into visible puckering. On 210D nylon or a light TPU laminate this is the dominant risk, managed with a cutaway rather than a tearaway backing, an underlay stitch, and a lower-density digitising file; on 12 oz canvas or 600D polyester the same artwork runs at full density. Needle penetration also perforates any waterproof coating, so embroidery and a wet compartment are mutually exclusive unless the mark moves to a patch applied after lamination.
Cost in embroidery tracks stitch count, not colour count. A typical front-panel logo runs between 3,000 and 8,000 stitches; a large crest with fill areas can exceed 20,000. Digitising is a one-time charge per artwork, and the stitch file is not interchangeable with the print vector — an AI file supplied for printing still has to be converted into a file defining direction, underlay and trims. Machine time matters too, which is why embroidery sits above a two-colour screen print even at volume.
| Attribute | Dye sublimation | Embroidery |
|---|---|---|
| Substrate requirement | Polyester or a polymer-coated surface only | Any fabric heavy enough to hold thread, roughly 200 g/m2 and above |
| Ground colour | White or very light only; no white dye exists | No restriction; thread is opaque |
| Colour range | Unlimited tonal colour; no metallics or fluorescents | Thread palette, typically one to eight thread colours per logo |
| Hand feel | None; the dye is inside the fibre | Raised; stitch build adds thickness and structure |
| Smallest legible detail | Fine lines print cleanly; tones shift on coloured grounds | Letter height below about 5 mm fills in; strokes under 1 mm are risky |
| Rub behaviour | High; there is no surface film to abrade | High; thread can snag if density is set too low |
| Wash behaviour | High, because the colour is fixed in the fibre | High with polyester thread; rayon thread is weaker when wet |
| Set-up cost behaviour | Paper and press set-up; no per-colour screen | One digitising charge per artwork, then cost per 1,000 stitches |
| Volume sweet spot | 500 pieces and above on a polyester shell | 500 pieces and above; cost tracks stitch count |
| Failure mode to watch | Colour shift between dye lots and between panels | Puckering on light fabric and coating perforation on laminates |
Thread and trim choices belong in the specification too. Polyester thread holds colour and strength through washing far better than rayon, which is worth naming because rayon is still quoted for its sheen. Thread and backing should be covered by the same certificate requested for the shell fabric, and buyers selling into the EU routinely ask for the assembled bag to be tested as a finished article.
Raised, Applied and Hardware Marks: Emboss, Woven Labels, Patches, Metal Plates and Hangtags
Not every brand mark is printed. On leather and thick PU the mark is pressed in; on canvas and nylon it is often applied as a separate label, patch or plate. These methods cost more per piece than a one-colour print and add an operation to the sewing line, but they read as higher value and survive abrasion better than any surface film.
Emboss, deboss and foil on leather and PU
Embossing raises the mark and debossing sinks it, using a heated metal die under pressure, and three variables govern the result: temperature, dwell time and pressure. On genuine leather the window is wide; on PU it is narrow, because the surface coating softens and can gloss over or melt if the die runs too hot or dwells too long. Production parameters typically sit around 120-160 C with a dwell of 2-6 seconds, but the correct setting is specific to the coating and must be established on a trial panel. Artwork constraints follow from the physical die: strokes below roughly 1.5-2 mm do not form cleanly and letters below about 4 mm are lost.
Hot-foil stamping uses the same press with a foil carrier between die and substrate, depositing a metallic or pigment layer in the pressed area. It gives the only true metallic finish available in the category — no ink or dye produces a convincing gold — and changing foil colour costs almost nothing once the die exists. A blind emboss, with no foil, gives the most restrained result and the lowest per-piece cost of the three. Pressure alone will not hold a mark on a soft, foam-backed PU; the material needs enough body to take a set.
Woven labels, patches and plates
A woven damask label is the standard secondary brand mark on a soft bag. Woven on a loom in polyester thread, typically 20-40 mm wide with up to eight thread colours, it is sewn into a seam allowance, tacked to a lining pocket or folded over a bound edge. It holds colour indefinitely and adds almost no cost, but fine detail is limited by thread width, so a label carrying a long legal line or a small barcode should be printed satin instead. Printed satin reproduces fine text and scannable codes but fades faster.
Patches move the mark off the shell and onto a controlled small panel, which is the standard workaround when the shell cannot take the decoration directly. A PU patch can be debossed, printed or high-frequency welded and then stitched or riveted to the front panel; a leather patch of 1.0-1.6 mm takes a blind emboss well. Metal plates in zamac alloy, brass or stainless steel give the hardest-wearing mark in the category at 20-50 mm and 3-12 g per piece, riveted or screwed through a reinforcement patch so the fabric does not tear. Plating quality varies; a cheap finish tarnishes in a humid bathroom. Where a bag is marketed to children, metal components fall under the lead and phthalate limits of the CPSIA, so the specification should call for compliance testing on the finished assembly.
Hangtags deserve a mention because they cost the least and are checked first at retail. A 45-90 mm card on 300-400 g/m² board, printed with the mark, product name, barcode and mandated fibre and care text, hangs from the zip pull or a D-ring. Because it is printed digitally on paper, its own minimum can be far lower than the 500-piece bag minimum. It is also the weakest element: the card tears off in transit and says nothing about the bag once it is gone.
| Applied mark | Typical size and format | Where it goes | Cost and MOQ behaviour |
|---|---|---|---|
| Blind emboss, no foil | Logo 30-70 mm wide, 0.8-1.5 mm relief | Centre front panel on leather or thick PU | One die charge, roughly $80-$250 illustrative; die reusable across seasons |
| Hot-foil stamp | Logo 25-60 mm, gold, silver, matte black or pigment | Leather, PU and coated canvas front panels | Die plus foil; changing foil colour is cheap, changing artwork is not |
| Woven damask label | 20-40 mm wide, 40-90 mm long, up to eight thread colours | Inside seam, lining pocket or over a bound edge | Loom set-up roughly $30-$90 illustrative; label MOQ commonly 500-1,000 pieces |
| PU patch, debossed or printed | 30-60 mm, 0.6-1.2 mm thick | Front panel or sleeve pocket, stitched or riveted | Low tooling; adds one sewing operation per bag |
| Leather patch | 35-70 mm, 1.0-1.6 mm thick, edges painted | Front panel, zip-pull base or side gusset | Higher material cost; patch MOQ often 500-1,000 pieces per style |
| Zamac or brass metal plate | 20-50 mm, 1.5-3 mm thick, 3-12 g | Front panel, riveted through a reinforcement | Shape tooling roughly $150-$600 illustrative; stock shapes need no tooling |
| Printed hangtag card | 45-90 mm, 300-400 g/m2 board, string or elastic loop | Zip pull or D-ring | Lowest unit cost; card quantity can be decoupled from bag MOQ |
Combining marks is normal and usually desirable: a foil-stamped wordmark on the front panel, a woven label in the side seam carrying the legal name and fibre content, and a hangtag carrying the barcode. What matters is that each element is specified on the tech pack with its own dimensions, placement datum, material and colour reference, because inspection measures against that pack and cannot approve an element never written down.
Artwork Preparation: Vector Files, Colour Separation and Pantone Matching
Most decoration problems that surface in production were created in the artwork file weeks earlier. A logo drawn for a website is not the same asset as a logo prepared for a four-colour screen print on canvas, and working from the wrong file type is the most common cause of a failed strike-off.
What to supply
For any printing, cutting or foil method the master should be a vector file — AI, EPS, SVG or a PDF with editable paths — with all text converted to outlines and all strokes expanded. Vector artwork scales without loss, which matters because the same mark may be printed at 25 mm on a pouch and 120 mm on a vanity case. Where the artwork is inherently photographic, supply a raster file at 300 dpi at final print size in TIFF or PSD, and accept that enlarging it later is not possible. For embroidery the vector master is still required, but the production file is a digitised stitch file produced from it, and the artwork itself usually needs simplification: thin strokes thickened, small text enlarged, gradients removed because thread cannot render a soft tonal transition.
Colour separation is the next step and it belongs to the buyer's designer, not to the press operator. Screen printing needs one separated layer per spot colour, each with its own screen. Direct-to-film and sublimation need no separation at all, because the image is printed in process colour. Foil and vinyl need flat, ungraduated shapes. If the brand mark exists as a process-colour illustration and the chosen method is screen printing, someone has to decide which spot colours replace the CMYK build, and that decision should be made against a physical strike-off rather than on screen.
Matching a brand colour on fabric
Pantone references for textiles are given in the TCX system, which is dyed on cotton, and matching them on a coated polyester or a PU laminate is an approximation, not an exact science. Ink opacity, the colour of the ground, cure temperature and the gloss of the coating all shift the result. Dark grounds need a white underbase under light colours, and that underbase changes the perceived hue. The practical approach is to specify the Pantone TCX reference as the intent, agree a numerical tolerance such as a Delta E of 3 or less measured under D65 lighting, and then approve a physical strike-off on the actual production fabric as the governing reference. That approved swatch should be retained and cited on the purchase order, because a colour dispute months later is settled against the retained sample, not against a printed colour book.
Two further points save rework. First, state the print size in millimetres on the tech pack; a vector file carries no scale, and a logo sent without dimensions will be set to whatever fits the platen. Second, define clear space around the mark and a minimum size at which it may be reproduced, so that a smaller pouch in the same family does not end up with a mark that has been shrunk past legibility.
- Vector master — AI, EPS, SVG or PDF with editable paths, all text outlined and strokes expanded; required for print, vinyl, foil and as the source for embroidery digitising.
- Raster file — TIFF or PSD at 300 dpi at final print size; required only for photographic artwork going to sublimation or direct-to-film.
- Stitch file — a digitised embroidery file that defines stitch direction, underlay, density and trims; not interchangeable with the print vector.
- Colour separation — one layer per spot colour for screen printing; unnecessary for digital methods.
- Pantone TCX — the textile colour reference system; a target on fabric, not a guarantee.
- Strike-off — a printed or embroidered sample on production fabric, approved and retained as the governing colour and quality reference.
- Clear space — the minimum empty margin around a mark; protects legibility when the same artwork is scaled across a product family.
Finally, keep the artwork package versioned. A brand refresh midway through a season is the classic source of a shipment carrying the old mark: the new file reaches the artwork department but not the press, or the old screen is still on the rack. Number every revision, state the revision on the tech pack, and require the pre-production sample to be photographed against the current revision before bulk cutting begins.
Specifying Durability: Fastness Testing as a Purchased Method, and Brand Rights
Durability is not a property a buyer discovers; it is a requirement a buyer specifies. That distinction matters, because a cosmetic bag is a high-contact object — rubbed against suitcase linings, wiped with remover, washed rarely but aggressively. A decoration with no assigned test is judged by eye at goods-in, and by the customer three months later.
Write the method, not the hope
The correct form of a durability clause names the test method, the target rating and the sample it is measured on. Colour fastness to rubbing is assessed by the crocking method in the AATCC test-method series or by the rubbing part of the ISO 105 series; wash fastness by an accelerated laundering method or the corresponding ISO 105 domestic-laundering procedure; light fastness by xenon-arc exposure. A typical specification for a printed mark is a dry-rub rating of 4 and a wet-rub rating of 3-4 on the grey scale, with colour change of 4 after the agreed wash cycle. Those figures are targets written into the order; the laboratory reports the measured value against them.
Printed films need mechanical tests as well as colour tests, because a print can hold its colour perfectly and still peel. A tape-adhesion check after a stated number of flex cycles, or a Martindale or Wyzenbeek abrasion exposure with a visual endpoint, catches delamination that a colour test never sees. For embroidery the equivalent is simpler: wash the made-up bag once, dry it as specified, and compare it against a retained reference for puckering, thread break and backing show-through. Edition numbers should be confirmed as current, because test methods are revised.
Testing is timed against the programme, not bolted onto the end of it. The pre-production sample — bulk fabric, bulk ink, production press parameters — is the correct article to test; a report on a lab-dip tells a buyer very little. Finished goods are then inspected to AQL 2.5 under ISO 2859-1, and decoration should appear in that inspection as defined defects: placement outside tolerance, registration drift beyond the agreed figure, colour outside the retained reference, or visible cracking and lifting. Sampling will not catch a systemic adhesion problem, which is why the pre-production test exists.
| Risk it controls | Method family to specify | Target to write into the spec | Sample state to test |
|---|---|---|---|
| Colour transfer onto clothing or hands | Crocking method in the AATCC series, or ISO 105 rubbing | Dry rub 4 and wet rub 3-4 on the grey scale | Printed panel from the bulk fabric lot |
| Colour loss or bleeding in washing | Accelerated laundering in the AATCC series, or ISO 105 domestic laundering | Colour change 4 and staining 3-4 at the agreed cycle | Panel sewn into a bag, washed as made up |
| Fading under retail or bathroom light | ISO 105 xenon-arc light fastness | Rating of 4 or better at the stated exposure | Off-the-tool sample before bulk cutting |
| Ink film cracking or peeling | Tape adhesion after a stated flex count, or Martindale abrasion | No cracking visible to the naked eye at the agreed cycle | Panel printed on the production coating |
| Embroidery pucker or thread pull | Visual comparison against a retained reference after laundering | No pucker beyond the reference; no thread break | Made-up bag washed once and dried as specified |
| Metal tag tarnish or corrosion | Neutral salt-spray exposure for a stated number of hours | No base-metal corrosion or plating loss | Finished tag mounted on the bag |
| Coating damage from press heat | Post-press inspection for gloss change and delamination | No gloss change and no delamination | Panel pressed at production temperature and dwell |
Who owns the mark
The last subject in any decoration brief is legal rather than technical, and it is not optional. Artwork supplied for printing must be the buyer's own mark, or a mark the buyer is licensed to use; no programme should ever be commissioned to reproduce a protected trademark belonging to someone else. The brand owner warrants that the artwork is original or licensed, supplies evidence of registration or licence, and carries the indemnity in the supply agreement. The programme coordinator's role is to ask for that evidence and to decline artwork that cannot be supported. A sourcing partner coordinating bag programmes — QUANZHOU JUNYUAN BAGS has coordinated this kind of work since 2014 — will normally request a trademark reference or an authorisation letter before any logo reaches a tool, a screen or a die.
The practical risk is not abstract. Goods bearing an unauthorised mark can be detained at the border and destroyed at the importer's cost, and tooling already paid for becomes worthless. Licensed character artwork adds a further layer: a licence is limited by territory, product category and date, so a licence covering apparel does not automatically cover a cosmetic bag. Where the product sells through a marketplace, the brand owner should be ready to show documentation to the platform on request.
- Confirm ownership or licence before any artwork is released to tooling.
- Keep a signed artwork approval and a retained reference sample for every revision.
- Check that a brand licence covers bags specifically and covers the territory of sale.
- Put the indemnity for artwork originality in the supply agreement, on the buyer's side.
- Record the trademark reference on the tech pack so re-orders can be verified quickly.
The B2B Customisation View
Brand owners approaching cosmetic pouches, vanity cases and beauty organisers usually arrive with a mood board, a target landed cost and a launch date; the technical pack is what turns those three inputs into a repeatable specification.
Programme data for this category: minimum order quantity 500 pieces per style and colourway, sampling in 6–10 working days (12–15 working days for complex constructions), bulk production 35–50 days after sample approval, final random inspection at AQL 2.5 under ISO 2859-1, FOB Xiamen, T/T 30/70.
Engaging a sourcing partner gives the brand owner one channel for the awkward questions — shade drift, component substitution, carton marking — that otherwise bounce between three vendors.
Which Brand Types This Guide Serves
Decoration choice is a brand-stage decision as much as a technical one, because the same 500-piece minimum supports very different strategies. A brand launching its first pouch is optimising for flexibility: artwork that may still change, a quantity close to the minimum, and no appetite for tooling that only pays back on a third re-order. A brand with an established visual identity is optimising for repeatability: the same Pantone reference, the same placement datum and the same method across twelve SKUs and four seasons, even if that means paying for a die or a digitised file up front. Both are legitimate, and neither should be sold the other's method.
- Start-up and indie beauty brands — a first run at 500 pieces per style and colourway, usually direct-to-film or a two-colour screen print, chosen because artwork can still be revised between seasons without writing off tooling.
- Established colour-cosmetics brands — multi-SKU families where consistency matters more than unit cost; expect a locked Pantone TCX reference, a retained strike-off, and a mix of foil or emboss on the front panel with a woven label in the seam.
- Retailers and private-label chains — decoration that has to survive a planogram and a barcode scan, so a printed hangtag plus a woven label carrying fibre content and legal name, with placement specified against a datum.
- E-commerce and marketplace sellers — search demand for the category includes roughly 5,400-6,600 monthly searches for custom makeup bag and about 74,810 weekly searches for toiletry bag (ASINSIGHT 2026.07, search demand rather than revenue), which rewards distinctive decoration that photographs clearly at thumbnail size.
- Gift, hospitality and amenity buyers — one or two flat spot colours at a fixed Pantone reference, screen printed on canvas or non-woven, with a hangtag carrying the campaign message and a strict delivery window.
- Subscription and sample-box operators — small pouches where the print area is tiny, so a woven label or a small PU patch usually beats any attempt to shrink the printed mark below legibility.
A method with tooling — an embossing die, a metal plate, a digitised stitch file — is only the right choice if the mark will be unchanged for several seasons. Where artwork is still moving, or where the first order is a test of demand, the flexible digital routes keep the option to change the mark without writing off investment. Buyers should ask which charges repeat on re-order before approving a decoration quote.
Frequently Asked Questions
Which decoration method gives the sharpest small logo on a 210D polyester pouch?
Direct-to-film usually holds fine detail better than screen printing on a light 210D shell, because the image is printed digitally rather than forced through a mesh. Expect legible strokes down to roughly 0.5 mm. Screen printing on the same fabric needs a 200-230 mesh screen and a low-bleed ink, and thin lines reversed out of a solid fill are the first detail to close up. Embroidery is the weakest option at that weight, because the needle perforates the weave and dense stitching pulls the panel into puckers.
Why does dye sublimation require a polyester cosmetic bag?
Sublimation is a diffusion process, not a coating. A disperse dye is heated to roughly 190-210 C until it turns to gas, then diffuses into the polymer chains of the fibre and is fixed there as it cools. Polyester accepts that dye; cotton, nylon, leather and uncoated canvas have no affinity for it, so the image will not build. A polymer-coated surface can be made to work, but the coating becomes part of the specification. There is no white dye in the process either, so the ground fabric must be white or very light.
What minimum letter height should embroidery artwork respect?
Plan for a cap height of roughly 5-6 mm as the practical floor for a satin-stitched letter, and treat anything below that as a candidate for simplification or for a different method. The reason is mechanical: the columns of thread that form a letter have physical width, and below about 5 mm the counters of letters such as e, a and o fill in. Stroke widths below 1 mm are equally risky. Where a mark must appear smaller than that, move it to a woven label or a small PU patch rather than shrinking the stitch file.
How many colours can a screen-printed logo carry before the cost escalates?
Each spot colour needs its own screen, its own set-up and its own press pass, so cost rises almost linearly with colour count at low volume. One to three colours is the normal economic range for a bag programme. Beyond four or five, the choice is between simulated process printing, which reproduces tonal artwork with halftone dots in four to six screens, and moving the artwork to direct-to-film, where colour count has no effect on price. The break-even point depends on quantity, because per-colour set-up is amortised over the run.
Is direct-to-film cheaper than screen printing at 500 pieces?
It depends almost entirely on colour count, and the comparison should be priced rather than assumed. Screen printing carries a per-colour set-up charge that is divided across the order, so at 500 pieces a two-colour mark is usually the cheaper route while a five-colour or gradient mark is usually not. Direct-to-film carries no screen charge and a flat per-piece figure regardless of how many colours the artwork uses. As an illustrative planning range, screen printing adds roughly $0.15-$0.60 per piece per colour, while direct-to-film runs roughly $0.40-$1.50 per piece.
Can a printed logo cross a zipper or a seam?
Not in a single pass. Screen printing and transfer both need a continuous plane that can lie flat under a press head, and a bound seam, a piped edge or a zipper tape interrupts that plane and changes how the fabric registers. The options are to split the artwork across panels, to move it onto a flatter area with 8-10 mm of clearance from the seam line, or to convert it into an applied patch that bridges the interruption. On a zipper specifically, remember that the tape and coil compress differently from the surrounding fabric under pressure.
What file should a brand owner send for a printed logo versus an embroidered logo?
For printing, cutting or foil work, send a vector master in AI, EPS, SVG or PDF with all text converted to outlines and strokes expanded, plus the Pantone TCX reference and the print size in millimetres. Vector artwork scales cleanly, which matters when one mark appears on a small pouch and a large vanity case. For embroidery, send the same vector file but expect it to be converted into a stitch file defining direction, underlay and density; a print vector and a stitch file are not interchangeable. Photographic artwork needs a raster file at 300 dpi at final size.
How closely can a Pantone reference be matched on fabric?
Treat a Pantone TCX reference as the intent rather than the outcome. Ink opacity, ground colour, cure temperature and coating gloss all shift the final hue, and a dark ground needs a white underbase that changes the perceived colour further. The working approach is to name the TCX reference, agree a numerical tolerance such as a Delta E of 3 or less under D65 lighting, then approve a physical strike-off on the production fabric as the governing reference. That retained swatch settles any later dispute, and repeat orders should be checked against it for dye-lot shift.
What target rub-fastness rating should be written into a purchase order?
Name the method as well as the number. Colour fastness to rubbing is assessed by the crocking method in the AATCC series or by the rubbing procedure in the ISO 105 series, and the usual targets for a printed cosmetic bag are a dry-rub rating of 4 and a wet-rub rating of 3-4 on the grey scale. Heavy dark prints on coated shells often struggle to hold the wet figure, so negotiate the target before the order rather than after a failed report. The laboratory reports the measured value; the buyer decides acceptance.
Does embroidery compromise water resistance on a TPU-laminated pouch?
Yes, if the mark is stitched through the laminated panel. Every needle penetration is a hole through the coating, and a dense logo puts hundreds of them in one area, so the wet compartment is no longer sealed. The standard solutions are to use a printed method such as direct-to-film on the laminated area, to move the embroidery to an outer pocket outside the wet zone, or to apply an embroidered patch after lamination. Where embroidery is essential, specify placement away from the lining seam and test the made-up bag for leakage.
What is the cost behaviour of an embossing die compared with a screen printing set-up?
An embossing die is a one-time tooling charge, illustratively $80-$250 for a simple logo, and a metal die lasts a very long production life, so it pays back across repeat seasons. Changing foil colour afterwards is cheap; changing the artwork means a new die. Screen set-up is charged per colour per artwork and is often reclaimed after a run, so it repeats on every re-order. The die route suits a stable mark on leather or thick PU; the screen route suits artwork that still changes.
Do metal logo plates add weight or corrosion risk to a travel cosmetic bag?
Both, and both are manageable. A zamac, brass or stainless plate of 20-50 mm typically weighs 3-12 g, which is negligible on a packed vanity case but noticeable on a hanging bag that is rated by hook load. Corrosion depends on plating quality and on the environment: a bathroom is humid and a cheap finish will tarnish or spot. Specify the alloy, the plating thickness and a neutral salt-spray exposure with a stated endpoint. Rivets also need a reinforcement patch behind the fabric, or the plate will eventually tear out of a light shell.
Who is responsible if artwork supplied for printing infringes a trademark?
Responsibility sits with the brand owner commissioning the work. Artwork supplied for decoration must be the buyer's own mark or one the buyer is licensed to use, and no programme should ever be asked to reproduce a protected trademark belonging to someone else. The brand owner warrants originality, supplies a registration or licence reference where the mark is claimed, and carries the indemnity in the supply agreement. The role of the programme coordinator is to request that evidence and to decline artwork that cannot be supported. Detained or destroyed goods are the buyer's loss.
How is decoration placement tolerance inspected under AQL 2.5?
Inspection under AQL 2.5 follows the sampling plan in ISO 2859-1, and decoration has to be defined as a defect class before the plan means anything. State placement as a dimension from a named datum in the tech pack, set a tolerance of about plus or minus 2-3 mm, and classify what counts as critical, major and minor. Registration drift, colour outside the retained reference and visible lifting or cracking each need their own definition. Sampling finds random placement errors but not a systemic adhesion problem.
People Also Ask
What is the cheapest way to put a logo on a makeup bag?
A single-colour screen print on a flat panel is usually the lowest-cost permanent mark, because one screen and one pass is the minimum viable set-up. A woven label sewn into a seam allowance is comparably cheap and adds no print operation. A printed hangtag is cheaper still per unit but is not a mark on the bag at all. Multi-colour logos, gradients and photography all push the cost up, because they force a move from single-screen printing to digital transfer.
Can you print a photo on a cosmetic bag?
Yes, by two routes. Dye sublimation prints a photograph into a white or light polyester shell, with no hand feel and no film to crack, but it cannot print white and will not work on cotton, nylon or leather. Direct-to-film prints the image on a carrier and transfers it onto almost any substrate including dark grounds, because it lays down a white underbase first, at the cost of a thin film layer. Supply the image at 300 dpi at final size either way.
Does a printed logo crack on PU cosmetic bags?
It can, and the cause is usually chemistry rather than the printing itself. Plasticisers inside PVC and some PU coatings migrate slowly to the surface and soften an ink film from underneath, while a coating with a silicone finish resists adhesion from the start. The controls are to specify an ink system qualified for that coating, to confirm full cure rather than surface drying, and to require a tape-adhesion check after a stated number of flex cycles on a pre-production panel. PU also hydrolyses with age, so storage conditions matter.
How long does a custom logo makeup bag sample take?
Sampling runs 6-10 working days for a standard construction and 12-15 working days for complex ones. Decoration can add time on top: a printed strike-off may need a second round to hit the colour, embroidery needs the artwork digitised into a stitch file, and an embossed logo needs a die cut before any sample can be made. Bulk production then takes 35-50 days after sample approval, with shipment on FOB Xiamen terms and payment T/T 30 deposit, 70 against bill of lading.
What is the difference between a woven label and a printed label?
A woven damask label is made on a loom with polyester thread, typically 20-40 mm wide and limited to around eight thread colours, and it holds its colour for the life of the bag. Fine detail is limited by thread width, so small text and barcodes should go on a printed satin label instead. Printed satin reproduces fine text and scannable codes but fades faster and looks shinier. Both are normally sewn into a seam allowance or folded over a bound edge.
References & Standards
- ISO 2859-1 sampling procedures for inspection by attributes
- ASTM D2053 standard terminology relating to zippers
- AATCC TM61 colour fastness to laundering
- IEC 62321 determination of certain substances in electrotechnical products
- OEKO-TEX Standard 100 testing for harmful substances
- Textile Exchange Global Recycled Standard
- US CPSC CPSIA consumer product safety improvement act
- ECHA REACH regulation on chemicals
- TSA 3-1-1 liquids rule for carry-on baggage
- ASTM D751 standard test methods for coated fabrics
- ISO 105 textiles tests for colour fastness
- Global Organic Textile Standard GOTS
In-Depth Articles in This Category
19 dedicated articles sit under this pillar guide.
Related Pillar Guides
Request a Sample or a Written Quotation
Send the silhouette, dimensions, material preference and logo artwork, and the programme team will return a written quotation with MOQ, sampling window, bulk lead time and inspection standard.
Email: [email protected] · WhatsApp: +86 177 5002 0688