How to Repair a Cosmetic Bag Zipper: DIY Fix Guide
Executive Summary
How to repair a cosmetic bag zipper is answered by identifying which of the five components has failed before any tool is used. The chain holds the interlocking elements, the slider draws them together or apart, the top and bottom stops limit slider travel, the tape carries the elements into the seam, and the pull transmits the user's force. A zip that separates behind the slider is a spread slider jaw and is fixed in minutes; a zip with a missing element in the middle of the chain is a different fault and usually is not worth repairing.
Four repairs are realistic at home: closing a spread slider jaw, replacing a slider through an opened bottom stop, fitting a replacement top stop, and restitching tape that has pulled out of the seam. Anything involving a broken element mid-chain, a torn tape or a coating that has delaminated from the tape points to replacement of the whole zip or of the bag. Where failures repeat across a batch, the answer is a specification change: gauge, element type, tape width and cycle-test expectation, checked at AQL 2.5 under ISO 2859-1.
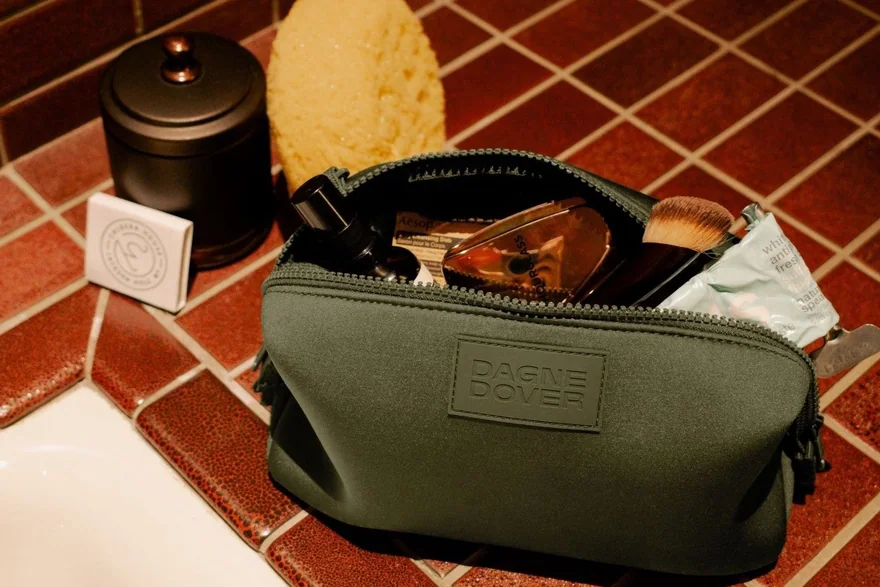
What actually fails on a cosmetic bag zipper
A zipper on a cosmetic bag is a small mechanism with five parts, and almost every repair goes wrong because the wrong part gets blamed. Standard terminology helps here: ASTM D2053 zipper terminology defines the chain as the assembled elements, the slider as the part that opens and closes them, the stops as the fittings that limit slider travel, the tape as the fabric carrying the elements, and the pull as the attachment the user grips. Naming the part is most of the diagnosis.
Cosmetic bags put unusual loads on that mechanism. The bag is packed to 70-90 percent of internal volume, so the chain is under lateral tension every time it is closed. Powder and cream residue works into the element gaps and into the slider channel. Brushes and compacts press against the tape from inside. And the bag is often closed one-handed, which loads one side of the slider body at an angle rather than pulling squarely.
The result is a predictable failure ranking. Slider faults come first, at roughly half of all reported problems, followed by stop loss, then tape separation from the seam, then element damage, then pull breakage. That ranking matters because the first three are repairable at home and the last two usually are not, so a diagnosis that starts at the slider will resolve most real cases in under twenty minutes.
- Slider: jaw spread, worn pull attachment, or a body packed with residue.
- Stops: a top stop lost from one tape, letting the slider run off the end.
- Tape: stitching pulled out of the seam, or the tape torn at the bottom stop.
- Elements: one element broken or missing mid-chain, so the chain cannot mesh past that point.
- Pull: the tab detached from the slider body, which is cheap to fix and often mistaken for a chain fault.
That ranking is also the repair order. Starting at the slider rather than at the chain resolves most cases quickly and avoids the common mistake of replacing a whole zip when a five-minute adjustment was enough.
Diagnosing the fault before any tool is picked up
Diagnosis takes under two minutes and it is worth doing properly, because the three repairable faults share one signature and the two non-repairable ones share another. Work the slider slowly along the full chain with the bag empty and flat, watching where the chain opens. If the elements mesh correctly everywhere except behind the slider, the slider is the fault. If the chain opens at one fixed point regardless of slider position, the element at that point is damaged.
Two measurements come next. The gauge, read from the number stamped on the slider body or on the bottom stop, tells the size of the replacement: #3 for a small pouch, #5 for a medium or structured case, #8 for a large train case. The tape width, measured across the fabric at 12-15 mm on #3 and 15-18 mm on #5, tells whether the zip can be sewn back into the existing seam without a new panel.
| Symptom | Component involved | Likely cause | Home fix | Verdict |
|---|---|---|---|---|
| Chain opens behind the slider as it passes | Slider | Jaw spread from overpacked closure | Squeeze the jaw closed with smooth-jaw pliers over a cloth | Repair, 5-10 minutes |
| Slider runs off the top and the bag will not close again | Top stop | Stop lost or cracked | Fit a replacement stop or stitch a bar-tack stop | Repair, 10-20 minutes |
| Chain splits from the bottom when the bag is packed | Bottom stop | Stop cracked or tape torn at the stop | Replace the stop, or open the tape to fit a new slider | Repair, 20-40 minutes |
| One fixed point in the chain will not mesh | Elements | Element broken or deformed | None reliable at home | Replace the zip or the bag |
| Zip closes but the tape pulls away from the shell | Tape and seam | Stitch length too long or seam allowance too narrow | Restitch at 2.0-2.5 mm with 6-8 mm allowance | Repair, 15-30 minutes |
| Pull tab hangs loose, chain works fine | Pull | Pull attachment worn through | Fit a replacement pull through the slider attachment point | Repair, 2 minutes |
One more check separates a dirty zip from a worn one. Brush the chain dry with a soft brush, wipe the tape with a barely damp cloth, then work the slider ten times. If the action improves markedly, the fault was residue in the slider channel and the fix is cleaning, not repair. Residue is common in cosmetic bags specifically, because powder compacts shed into the element gaps every time the bag is opened.
Tape condition is the final gate. A tape that has gone shiny, split along the fold, or lost its coating is finished even if the chain still works, because the tape is what carries the load into the seam. Tape abrasion is measurable rather than a matter of opinion, and buyers commonly reference the abrasion and colour-transfer work in the AATCC test methods collection when they specify a tape that will survive a season of daily opening.
- Chain opens behind the slider: slider fault. Chain opens at one fixed point: element fault.
- Read the gauge from the slider or bottom stop before ordering any replacement part.
- Clean the chain first; a marked improvement after ten cycles means it was residue, not wear.
- Shiny, split or delaminated tape ends the repair conversation regardless of how the chain feels.
- Measure tape width before restitching: #3 is typically 12-15 mm, #5 around 15-18 mm.
Four repairs that work at home, and one that does not
The repairs below are ordered by how often they succeed. All four need only flat-jaw pliers, a seam ripper, a needle and a polyester thread in the Tex 40 range, which is the weight most bag seams use. None of them need adhesive, and adhesive is worth avoiding on a cosmetic bag, because it stiffens the tape and then cracks at the fold within a few weeks.
- Spread slider jaw: wrap the slider in two layers of cloth, grip the jaw with smooth-jaw pliers across the flat face, and squeeze once with light pressure. Test, then squeeze again a fraction more. Over-squeezing locks the slider, which is a worse fault than the original.
- Lost top stop: close the chain, then either crimp a replacement stop of the matching gauge on the tape above the last element, or sew a bar-tack stop by hand with eight to ten passes of thread through both tape layers at the same point.
- Slider replacement: open the stitching at the bottom stop on one side with a seam ripper, slide the old slider off, feed the new slider on from the same side, close the stop, and restitch the tape at 2.0-2.5 mm stitch length.
- Tape pulled from the seam: remove the old stitch line, reset the tape so the element line sits 3-4 mm from the shell edge, and restitch with a 6-8 mm seam allowance, backstitching three stitches at each end.
| Repair | Gauge it suits | Tools | Working time | Realistic remaining life |
|---|---|---|---|---|
| Close a spread slider jaw | #3, #5 | Smooth-jaw pliers, cloth | 5-10 minutes | Weeks to months; the jaw will spread again under the same load |
| Fit a replacement top stop | #3, #5, #8 | Replacement stop, pliers or needle and thread | 10-20 minutes | Comparable to the original zip |
| Replace the slider | #3, #5 | Seam ripper, needle, Tex 40 thread | 20-40 minutes | Good, provided the chain and tape are sound |
| Restitch tape into the seam | Any gauge | Seam ripper, needle, thread | 15-30 minutes | Good, if the tape itself is not abraded |
| Replace one broken element mid-chain | None | Not recommended | Not applicable | Not applicable; the repair does not hold |
The repair that does not work is replacing a single element in the middle of the chain. Elements are formed onto the tape under pressure in production; a hand-fitted substitute cannot carry the same load, and it will pull out the first time the bag is packed full. If one element is gone, the chain above or below it is usable only if the bag can be resewn shorter, which is rarely worth the labour on a $0.45-$12.00 unit.
Two safety points are worth stating. The first is metal fatigue: a slider jaw that has been squeezed twice will work-hardened and crack on the third attempt, so if two squeezes do not hold, stop. The second is contamination: a zip on a bag that has carried liquids should be cleaned before any repair, since cream residue in the slider channel is both the likely cause and a hygiene issue during handling.
Run the slider twenty full cycles with the bag empty, then twenty more with it packed to about 80 percent, which is the load that caused the failure in the first place. A repair that passes empty and fails packed has not fixed the underlying overload; either the contents need to change or the gauge does.
- Use smooth jaws and cloth padding; serrated pliers score the slider and the scratch becomes a crack.
- Squeeze once, test, squeeze again. Never more than two tightening attempts on one slider.
- Match gauge exactly: a #5 slider on a #3 chain will not mesh, and a #3 on #5 will not pull.
- Avoid adhesive on tape repairs; it stiffens the fold line and cracks within weeks.
When to stop repairing and re-specify the zipper
Repair is a single-unit activity. Specification is a programme activity, and the two answers diverge the moment failures repeat. If more than about 2-3 percent of units in a delivered batch show the same zip fault, the fault is in the specification: gauge too small for the load, element type wrong for the contents, or tape too light for the seam. Repairing unit by unit in that situation costs more than changing the next order.
| Zipper type | Common gauge | Cost band per unit | Cycle life expectation | Water behaviour | Best bag type |
|---|---|---|---|---|---|
| Nylon coil, closed end | #3, #5 | $0.06-$0.22 | 500-1,000 open-close cycles | Wicks at the stitch line | Flat pouch, soft cosmetic bag |
| Nylon coil, reverse | #3, #5 | $0.10-$0.30 | 500-1,000 cycles | Wicks, but the stitch line is hidden | Structured case with a clean interior look |
| Metal elements | #3, #5 | $0.25-$0.70 | 1,000-2,000 cycles | Wicks at the stitch line | Premium vanity case, gift sets |
| Vislon-style moulded plastic | #5, #8 | $0.18-$0.55 | 800-1,500 cycles | Better resistance to moisture than coil | Travel toiletry bag, larger formats |
| Coated waterproof coil | #5 | $0.55-$1.40 | 500-1,000 cycles | Resists wetting at the face; seams still need sealing | Wet compartment, wash bag |
Four variables decide the specification. Gauge sets the strength: #3 on a 20 cm pouch, #5 on a 24-30 cm case, #8 on a train case or any bag that will be overpacked. Element type sets the feel and the cost, with coil the quietest and cheapest and metal the heaviest and most durable. Tape width sets how the load enters the seam, with 6-8 mm of seam allowance the practical minimum. Cycle expectation sets the test, and 500-1,000 cycles is a reasonable ask for a bag opened twice a day over a year.
Water behaviour is worth separating from strength at this point, because buyers frequently ask for both from one component. A coated coil zip resists wetting across its face but still has a textile tape, so the stitch line where the tape meets the shell remains the entry path unless it is welded or taped. Specifying a coated zip on a bag whose seams are stitched and unsealed buys a better face and no measurable gain in leak resistance.
The change itself is cheap and the validation is what takes time. A zipper specification change runs at a minimum of 500 pieces per style and colourway, samples in 6-10 working days (12-15 working days where the shell construction is complex), and bulk production of 35-50 days after sample approval, inspected at AQL 2.5 under ISO 2859-1, shipped FOB Xiamen, on T/T 30 deposit and 70 against bill of lading. Zip faults are among the easiest defects to catch at inspection, because they are functional rather than cosmetic: a cycle check on twenty sampled units tells the buyer more than a visual check on two hundred.
- Repeating faults above roughly 2-3 percent of a batch are a specification problem, not a repair backlog.
- Gauge by size and load: #3 for a 20 cm pouch, #5 for 24-30 cm, #8 for train cases.
- Ask for 500-1,000 open-close cycles as a stated test, not as a marketing claim.
- Tape width and a 6-8 mm seam allowance matter as much as the chain itself.
- Functional zip checks at AQL 2.5 catch more than visual inspection of the same sample size.
The B2B Customisation View
Range planning for makeup bags and toiletry bags works best when the hero style and the gift-with-purchase style are engineered together, sharing linings and hardware to protect the budget.
Planning figures used across the programme: MOQ 500 pieces per style and colourway, 6–10 working days sampling (12–15 when moulding or multi-layer lamination is required), 35–50 days bulk lead time, AQL 2.5 to ISO 2859-1, FOB Xiamen, T/T 30/70.
The value of a programme-coordination model is continuity: QUANZHOU JUNYUAN BAGS keeps the approved reference sample, the shade standard and the AQL record for every repeat order.
Which Brand Types Benefit Most
Zipper specification is one of the few places where a few cents per unit visibly changes how a bag performs, and the five buyer types should approach it differently. Start-up brands most often inherit a zip choice from a stock sample and never question it; asking for #5 instead of #3 on a 24 cm case typically adds under $0.15 per unit and removes the most common cause of a first-season return. Established brands with seasonal gift sets have a consistency problem rather than a strength problem, because a zip that behaves differently across two colourways of the same style reads as a quality difference even when the chain is identical; specifying one gauge and one element type across the family avoids it. Retailers and wholesalers buying mixed assortments should standardise on one or two gauges across the whole range, which simplifies both the repair guidance and any spare-parts conversation. E-commerce sellers gain from stating the gauge and the cycle expectation in the listing, since zip failure is one of the most cited negatives in the category and a stated specification is a direct answer to it. Gift and hospitality buyers, whose bags may sit filled and closed for a season before use, should ask for a tape and coating that will not stick or mark after months of static load.
- Start-up brands: move a 24 cm case from #3 to #5; it costs cents and removes the top return cause.
- Established brands: fix one gauge and element type across all colourways of a family so feel stays identical.
- Retailers and wholesalers: standardise on one or two gauges per range to simplify care guidance and spares.
- E-commerce sellers: state gauge and cycle expectation in the listing copy to pre-empt the most cited negative.
- Gift and hospitality buyers: specify a tape and coating proven under months of static, closed storage.
Frequently Asked Questions
What is the difference between a #3 and a #5 zipper on a cosmetic bag?
The number is the approximate element chain width in millimetres: #3 is around 4.5-5 mm across the closed elements with tape of 12-15 mm, #5 is around 6 mm with tape of 15-18 mm. #3 suits a 20 cm pouch, #5 a 24-30 cm case. They are not interchangeable; a slider of one gauge will not run on the other chain.
Why does a zipper close but then separate behind the slider?
That is a spread slider jaw. The two plates of the slider have been forced apart, usually by closing an overpacked bag, so the elements are no longer squeezed together as they leave the slider. It is the most common zipper fault on cosmetic bags and the quickest to fix, but the jaw will spread again under the same load if the bag keeps being packed that full.
Can a slider be replaced without opening the bottom stop?
Only if the zip has a separable bottom, which cosmetic bags rarely do. On a closed-end zip the usual route is to open the stitching at the bottom stop on one side, slide the old slider off and the new one on, then restitch. Some repairs cut the element line above the stop instead, but that shortens the chain and is rarely worth it.
What tool should be used to close a spread slider jaw?
Smooth-jaw pliers, with the slider wrapped in two layers of cloth so the jaws cannot mark the finish. Serrated jaws score the metal and the scratch becomes the next crack, which is a worse fault than the one being fixed. Squeeze once, test, then squeeze a fraction more if needed; never more than two attempts, because the jaw work-hardens and will break on the third.
How do you replace a missing top stop on a cosmetic bag zip?
Either crimp a replacement stop of the matching gauge onto the tape just above the last element, or sew a bar-tack stop by hand: eight to ten passes of polyester thread through both tape layers at the same point, finished with a whip stitch. The hand-sewn version is slightly bulkier but needs no parts and lasts as long as the tape.
Can one broken element in the middle of the chain be repaired?
Not reliably. Elements are formed onto the tape under pressure in production, and a hand-fitted substitute will not carry the closing load, so it pulls out the first time the bag is packed full. The practical options are replacing the whole zip or resewing the bag shorter so the damaged section is cut out, and at a typical unit price band of $0.45-$12.00 the second option rarely justifies the labour.
Why does a zipper keep catching the lining tape?
Because the lining has drifted into the element line. Either the tape has pulled out of the seam, or the lining panel was cut too close to the stitch line. Reset the lining so the fabric edge sits 3-4 mm clear of the element line and restitch at 2.0-2.5 mm; a lining saver or a binding strip between lining and chain prevents a repeat, and it costs less than the repair it avoids.
How much tension should a zipper carry when the bag is packed full?
Very little. A well-specified zip closes with the bag at 70-80 percent of internal volume, and it should do so without visible bowing across the chain. If the chain bows when closed, the contents are overfilling the bag rather than overloading the zip. Persistent bowing on a bag that is not full means the gauge is too small for the size, and #5 in place of #3 is the usual answer.
Does a metal zipper need lubrication, and what kind?
Occasionally, and dry rather than wet. Rub a candle stub or a dry graphite pencil along the element line, then work the slider and wipe away the excess with a dry cloth. Oils and sprays attract powder, which is exactly the residue that causes most cosmetic bag zip faults, so a wet lubricant makes the problem worse within weeks rather than better.
How many open-close cycles should a cosmetic bag zipper survive?
500-1,000 cycles is a reasonable expectation for a bag opened twice a day over a year, and 1,000-2,000 for a metal chain on a premium case. The number should be a stated test in the specification rather than a claim, and it should be run with the bag loaded, since an empty cycle test flatters every zip.
Can a standard coil zip be upgraded to a waterproof zip after production?
No. Water behaviour comes from the construction: a coated or film-faced chain, sealed seam lines and often a different slider. A coating applied to a finished bag is a surface treatment and does not change the stitch line, which is where water actually enters, so leak resistance has to be specified before cutting rather than added afterwards.
How is a zipper fault checked across a production run?
By functional sampling rather than by looking. A cycle check of twenty to thirty units drawn at AQL 2.5 under ISO 2859-1, run loaded rather than empty, catches jaw spread and weak stops that a visual check misses entirely. Zip defects are functional rather than cosmetic, which makes them unusually easy to detect on a small sample.
What gauge suits a 20 cm pouch versus a 30 cm vanity case?
#3 for a 20 cm pouch holding 15-25 light items, #5 for a 24-30 cm vanity case with dividers and a full brush set, and #8 for a train case or any bag that will routinely be overpacked. The driver is lateral load on the chain, which rises with bag width and with how full the bag is packed.
How long does it take to sample a bag with a changed zipper specification?
Six to ten working days for a straightforward gauge or element change, and 12-15 working days where the shell construction also has to change. Bulk production runs 35-50 days after sample approval, at 500 pieces per style and colourway minimum, inspected at AQL 2.5 and shipped FOB Xiamen on T/T 30 deposit and 70 against bill of lading.
Is a two-way slider worth specifying on a hanging toiletry bag?
Yes where the bag is opened from either end while hanging, because it lets the user reach one pocket without opening the whole face. It adds cost and one more failure point, so it suits a 24-30 cm hanging organiser rather than a small pouch. The two sliders should be specified as a matched pair from the same gauge.
People Also Ask
Can a broken zipper on a makeup bag be fixed?
Often yes. A spread slider jaw, a lost top stop, a loose pull tab and tape that has pulled out of the seam are all repairable at home with pliers, a needle and thread. A broken element mid-chain or a torn tape is not repairable, and in those two cases the whole zip or the bag itself is the thing to replace.
How do you fix a zipper that keeps separating?
If it separates behind the slider, the slider jaw has spread: wrap it in cloth and squeeze once with smooth-jaw pliers, then test the zip again. If it separates at the same point every time, an element is damaged and the zip needs replacing. If it opens from the bottom, the bottom stop has failed and needs a replacement stop fitted.
What size zipper is on a makeup bag?
Most small pouches use #3 coil and most structured cases use #5, with #8 reserved for large train cases. The gauge is stamped on the back of the slider body or on the bottom stop. Tape width runs 12-15 mm on #3 and 15-18 mm on #5, which is the measurement to take when ordering any replacement part for the zip.
How much does it cost to replace a zipper?
A replacement slider or stop costs pennies, so the cost is almost entirely labour. At production level, moving from #3 to #5 coil adds roughly $0.05-$0.15 per unit and moving to metal adds about $0.20-$0.50. Those figures are why a specification change is usually cheaper than repair whenever the same failure repeats across a batch. At unit level, that is why a specification change beats repair whenever the same fault appears across a batch.
Request a Sample or a Written Quotation
Send the silhouette, dimensions, material preference and logo artwork, and the programme team will return a written quotation with MOQ, sampling window, bulk lead time and inspection standard.
Email: [email protected] · WhatsApp: +86 177 5002 0688